Part I: The Experiment
I love retro systems, and always have been using emulators since they exist. The main caveat with that many of those emulators is that they tend to get outdated and stop working on newer operating systems. With Windows each major version scared me up to the point that my gaming PC is "frozen" on Windows 7 to avoid losing performance and compabitility. Since I switched to Linux, I've been trying to use emulators, with not so good results. So, when I read about the RetroPie project I felt like could be the solution: a dedicated but small gaming machine. I had a Raspberry Pi 2 not being used for anything so... why not?
I used the RPi 2 as a testbed with a spare 8GB SD card. Just following the official instructions and using the official image was enough and I didn't have a single issue. I love how it allows you to setup a USB-drive to add new content, by just setting up some folder structure on it, so I can just place new games and after plugging they get installed automatically.
As an alternative, Ars Technica has a detailed DIY guide, although as I mention later, careful if you play PSX or NeoGeo as their setup won't cool at all and the CPU will heat and lower the speed.
Everything went smooth and I could play some old console games, so I copied some MAME and NeoGeo romsets... and here I got my only issues:
- For NeoGeo, read the appropiate section and ensure you have the correct BIOS downloaded
- For MAME, documentation is not bad but I didn't read it so much and found the hard way about the concept of ROMset rebuilding. ROMs are dumped and emulated at a certain version, but as time goes by newer dumps might be achieved, and those usually are not backwards compatible. Combine that with the RPi MAME emulator supporting only until 0.78 ROMsets, and you get the answer to why most games didn't worked at the system when always worked for me at the PC. So either you rebuild the ROMsets for v0.78, or (the way I went as I'm lazy) directly search online for some full 0.78 ROMset to download and then filter.
Part II: Going to production
Emulation issues solved, the experiment was a success so I decided to buy a Raspberry Pi 3. After Nintendo's Mini-NES, there are many clones to use as Raspberry Pi cases. I didn't planned to buy any, but a friend read my tweet about setting up the RetroPie and instead of buying anything he gifted me not only with a case but an actual pack of a Raspberry Pi 3 + NES-like case + SD card + USB gamepad!
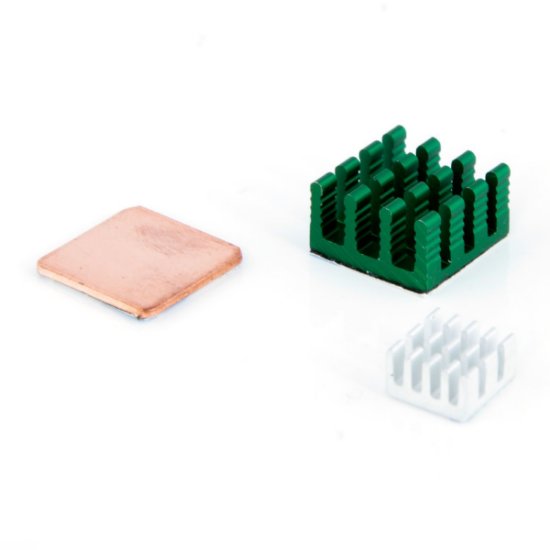
It came with some MAME games preinstalled but I preferred to do a clean install of the latest RetroPie. After installing games including the oldie but goldie Gran Turismo 2 for the original Sony Playstation, I noticed that the game slowed down after a few minutes of playing. Some research and touching the CPU to confirm it taught me that when gets hot, RPi lowers the CPU speed to avoid thermal issues. So, the case might be cool but wasn't good for CPU-intensive usage, despite having some heatsinks installed like the following:
Some more reading after it looked like the best solution was to add a fan to cool the CPU:
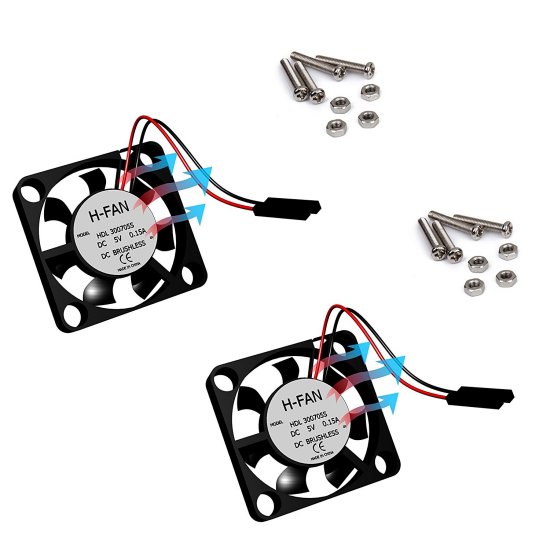
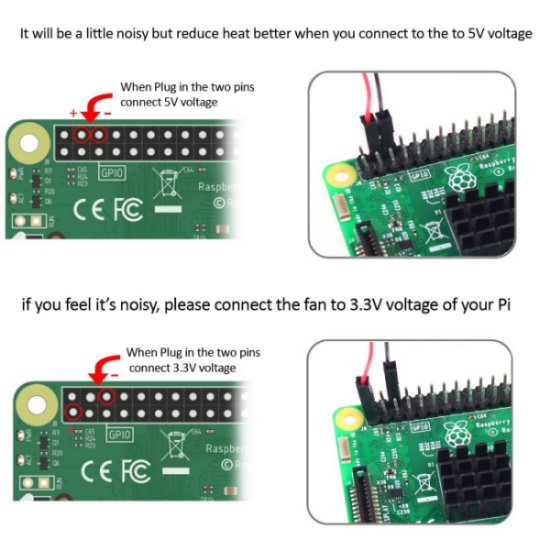
The fans can be setup at two different voltages. Being so small and already used to a semi-tower gaming PC, I directly went for the 5V voltage connection.
Update: After some testing, if you're not going to do emulation with the newest consoles, setting the voltage to 3V still cools up the interior but the fan makes almost no noise.
I originally had made additional ventilation holes to the case, hoping would be enough to let the hot air go out, but as it didn't worked I had to modify those holes to place and hold the fan:
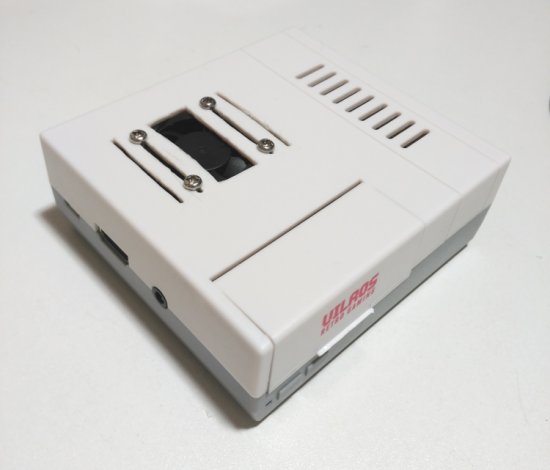
Everything finally assembled, I played through a few levels of Aliens vs Predator (MAME version, good benchmark), a few races in PSX Gran Turismo 2 arcade mode and the first full level of NeoGeo's Metal Slug. Not a single slowdown.
Part III: Replicating the success
I liked the system it so much that I actually bought another Raspberry Pi, a 3 B+ model, with an official case. This is the one that I'll keep at home to squeeze those extra 200MHz and better network speed it brings. I initially thought about just leaving the case open, but as the fans came in a 2-pack, I decided to also install the other one on it:
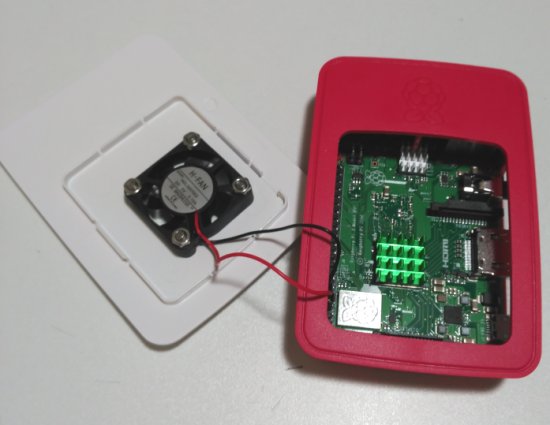
And after some patience and plastic cutting, this is how it looks fully assembled:
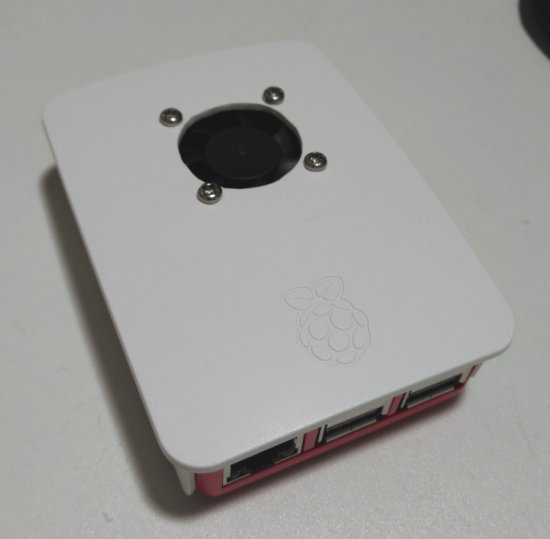
As you might notice the hole is not centered. This is on purpose to place the fan exactly above the CPU. Less aesthetic but I prefer pragmatism.
Even with the fan, the official case doesn't have any ventilation hole/grid, so when playing I open one of the side lids (the one without connectors) so the air flows out from it instead of being kept inside.
I'm only missing setting up the second gamepad for the system, as I have a handy original SNES to USB adapter that allows to plug two pads, but joystick configuration is so easy that I don't expect any trouble.
Closing thoughts
I'll use the NES-like system as a "portable arcade", for vacations, events, etc. as I just need an HDMI plug and I have an extra USB gamepad.
I haven't tested anything more powerful than Nintendo-64 emulator, but people seem to be using it to play even PSP games, so this 3.5 generation of the Raspberry Pi is already quite powerful, despite not having a decent GPU. RetroPie 4.4 feels quite stable and my plan is to stick with the system for as long as possible, as my only wish would be more MAME ROMs support, but even with the actual compatibility is fine by me.
I only tried the Raspberry Pi 2 with few games and then gifted it to my sister, so I really don't know the performance cap it has compared with a Pi 3 or 3B+.
Appendix
Other useful software I've installed will get listed here.
- Kodi: An amazing media player from the creators of XBMC, highly configurable and supporting plugins (although I haven't tried them).
Changelog
Update #1: Added Appendix section with Kodi software.
Update #2: Added a link to an Ars Technica guide which contains very detailed installation instructions.
Tags: Videogames